
FUGA-PAVE – 5 Steps to Installing Porcelain Paving
The FUGA-PAVE system is a complete solution designed for landscaping professionals, offering a straightforward and highly effective method for installing outdoor porcelain paving, natural stone, cementitious flags, cobbles, and other materials. Ideal for both residential and commercial projects, including heavily trafficked areas, FUGA-PAVE is simple to use and eliminates the need for additional additives. With its superior strength and permeability, this system outperforms traditional methods while delivering cost and time savings.
Recently, renowned landscaper and expert witness Gareth Wilson teamed up with T Hoyle Landscapes to demonstrate how to use the FUGA-PAVE system for a flawless porcelain paving installation. Their step-by-step guide showcases the process in detail, making it easy for professionals to replicate their success. By following these five essential steps, you can achieve a durable, very strong and high-quality finish on your next project.
Step 1: Preparing the Sub-Base and Bedding
A strong and stable sub-base is critical to the success of any paving project, serving as the foundation for your installation.
Apply MOT Type 1 aggregate in layers of 50mm, compacting each layer thoroughly. For optimal compaction, Gareth Wilson recommends using a plate compactor and working diagonally, horizontally, and corner-to-corner. This method eliminates weak spots and creates a uniformly solid base. The total thickness of the compacted sub-base should be minimum 150mm for patios and paths in most instances, but Gareth recommends 300mm to provide adequate support for the paving above.
Step 2: Laying with FUGA-PAVE Hybrid Mortar
The FUGA-PAVE Hybrid Mortar acts as the bedding layer, delivering exceptional strength and permeability. To prepare the mortar, mix it with clean grit sand in a 7:1 ratio, ensuring the mixture is consistent and free from lumps. Water is the only additional component required, eliminating the need for costly or complex additives.
Once mixed, the mortar is applied at a minimum thickness of 25mm. For projects requiring additional height adjustments, it can be laid up to 80mm thick without compromising strength. With a coverage rate of approximately 3.7m² per mix at 25mm, the mortar is both efficient and cost-effective. Its permeability prevents water pooling, while its strength—rated at 35 Newton Metres—far exceeds traditional mortar, ensuring a long-lasting installation that can withstand heavy use.

Step 3: Applying FUGA-PAVE Slurry Primer
Adhesion is one of the most critical aspects of paving, and the FUGA-PAVE Slurry Primer ensures a secure bond between the porcelain slabs and the mortar below. Before applying the primer, brush the back of each porcelain slab to remove dust and any moulding agents that may interfere with adhesion. This simple preparation step ensures that the primer bonds directly to the slab without barriers.
Mix the primer with clean water until a smooth, consistent texture is achieved. Apply a 2-3mm layer of primer to the back of each slab, ensuring full coverage from edge to edge. This step is essential for creating a monolithic bond with the hybrid polymers in the mortar, which enhances the overall strength and durability of the installation. When applied correctly, the primer prevents delamination and ensures the slabs remain securely in place for years to come.

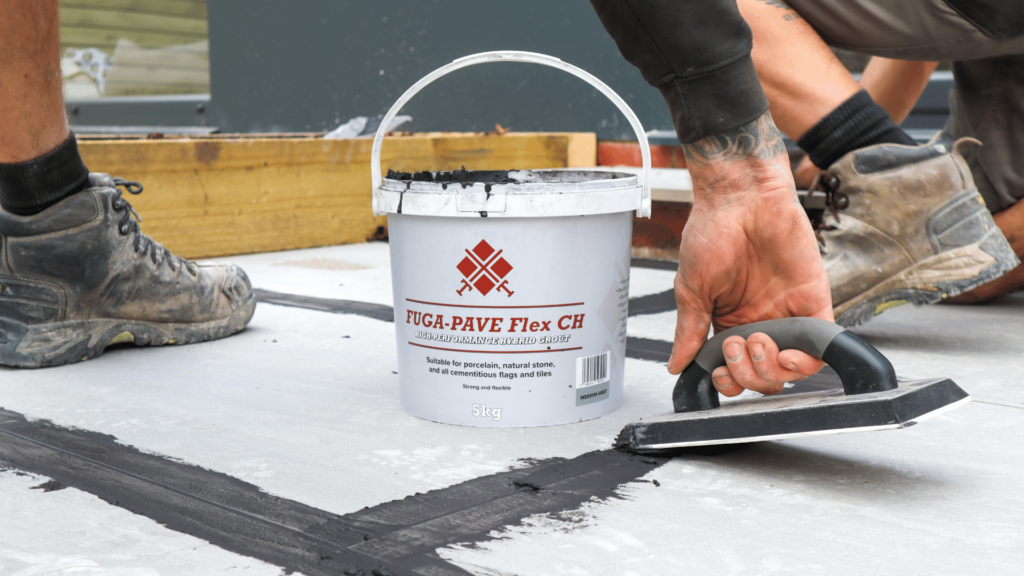
Step 4: Grouting with FUGA-PAVE Flex CH Grout
Grouting is where functionality meets aesthetics, and FUGA-PAVE Flex CH Grout is designed to excel in both areas. Available in a variety of colours—anthracite, jasmin, limestone, mid-grey, and light-grey—the grout allows you to choose the perfect shade to complement your paving. For this project, anthracite was selected, providing a bold contrast against the porcelain slabs.
The grout is mixed with clean water according to the manufacturer’s specifications, resulting in a smooth and workable consistency. Using a hand float or squeegee, apply the grout to the joints, ensuring they are completely filled, avoiding air-pockets. The grout’s unique formulation prevents efflorescence, making it an environmentally friendly choice that delivers a cleaner and more professional finish. Additionally, it is UV stable and can be applied just 3-4 days after the slabs are laid, streamlining the installation process without compromising quality. In the years since we have been selling the grout, we have not had notice of any subsequent failure.
Step 5: Cleaning the Grout
The final step in the process is grout cleaning, which enhances the overall appearance of the paving and ensures a professional finish. When the grout is touch dry, begin by emulsifying any excess grout from the surface of the slabs, then use a sponge to lightly clean the grout off, sweeping the sponge diagonally across the flags to avoid removing grout from the joints.
For a deeper clean, use a Raimondi Pedalo Washboy or similar cleaning system. These tools are specifically designed for grout removal, making the process quicker and more ergonomic. For larger areas, our Raimondi Berta Sponge machine saves time, backache and results in a flawless finish your clients will be delighted with. The FUGA-PAVE Flex CH Grout is formulated to be easy to clean off, ensuring that this final step is hassle-free and leaves your project looking flawless.
Exciting News: Tilers Tools to exhibit at the Landscape & Tile Show!
Tilers Tools to exhibit at the Landscape & Tile Show! We’re excited to announce that…

Aquacut Joins the Landscape and Tile Show 2025
Aquacut Joins the Landscape and Tile Show 2025 We are pleased to announce that Aquacut,…
Aquacut – Prioritising Safety and Precision in the Fight Against Silica Dust
Prioritising Safety and Precision in the Fight Against Silica Dust Recent press articles have raised…

Tilers Tools – Wet Saws and Their Uses: A Must-Have for Landscaping Professionals
Wet Saws and Their Uses: A Must-Have for Landscaping Professionals Wet saws have become an…